

How To Install Tensorflow Contrib
In uncomplicated words, TensorFlow is an open-source library for numerical computation, which is used to enhance the convenience and ease in car learning, and it is an entirely Python friendly library. TensorFlow can run and train deep neural networks for image recognition, for handwritten digit classification, recurrent neural networks, give-and-take embeddings, and sequence-to-sequence models for natural language processing, PDE (fractional differential equation) and motorcar translation. Most importantly, it supports product prediction at calibration with verbal models that are used for the grooming.
 Figure 1 TensorFlow logo
Five primary apply cases of TensorFlow
- This engineering is used for automatic prototype recognition systems because it consists of algorithms to place shapes for modeling purposes.
- Phonation and sound recognition process can be done through the TensorFlow, and information technology is also used for sentiment analysis or flaw detection.
- TensorFlow helps to improve the text-based recognition technology, and the best example is Google that supports diverse languages and the adequacy to transfer the text from i linguistic communication to another.
- It is used for analyzing the data and separating the meaningful states of it, and the best example of this use case is online streaming platforms (Netflix, YouTube), it uses statistical data to provide the all-time user experiences.
- TensorFlow is used for the video detection system, which ways information technology is helpful for movement detection or real-time threat detection systems.
Installing TensorFlow
Before starting the process of installation, let'south acquire that TensorFlow supports multiple GPUs and CPUs. Information technology means that the process of computations can be divided according to the devices to enhance the speed of the training with the help of parallelization. It can provide faster training by preparation algorithms.
In that location are two versions of TensorFlow available for the Windows user, and these versions are:
CPU supported TensorFlow: If the system does not run on the NVIDIA GPU, then the user has to install this version.
GPU supported TensorFlow: This version is used for faster computation and strong computational capacity.
GPU supported TensorFlow: This version is used for faster computation and strong computational capacity.
User can install TensorFlow on both Windows and macOS
For Windows user process is:
- Install Anaconda
- Create a .yml file for installing dependencies
- Use pip for adding the TensorFlow
- Launch Jupyter Notebook
For macOS user process is:
- Install Anaconda
- Create a .yml file for installing dependencies
- Launch Jupyter Notebook
So, for starting the TensorFlow installation process user accept to install the Anaconda, hence here is the installation process for both macOS and Windows:
Pace i: Install Anaconda in the device:
Download the Anaconda version 4.three.ane for the required system, and this version is essential for Python iii.6. Now you have to create .yml file to install TensorFlow, and the process is:
- Locate the path of Anaconda
- Set the working directory to Anaconda
- Create the yml file (For macOS user)
- Edit the yml file
- Compile the yml file
- Activate Anaconda
- Install TensorFlow (it is only for Windows user)
Locating the Anaconda
For the installation of Anaconda, the user has to locate a path for it.
Users can create a new anaconda environs, which includes the essential libraries.
For Windows
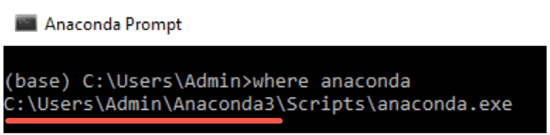
For the windows, the user tin can apply the Anaconda type and Prompt:
C:\>where Anaconda
For macOS:
For the macOS device, the user tin utilize the type and final:
The user has to create a new folder in the Anaconda, which contains Jupyter, TensorFlow, and ipython. In that location is a fast manner to install libraries and software to write a.yml file.

Stride two: Prepare and select the working directory
The user has to make up one's mind an appropriate directory in which the user wants to create a.yml file, and it will be located in the Anaconda.
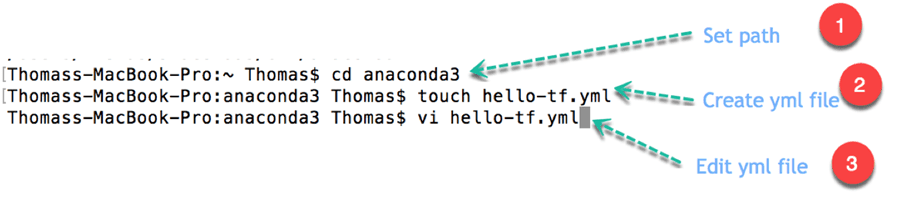
For macOS:
For the macOS, the default working directory will exist Users/USERNAME, path anaconda3, and the working directory are entirely identical. In the macOS devices, the latest folder will be shown right before the $, and the concluding will install the libraries in the working directory.
Users can modify the path to cd PATH in instance the path on the text editor does not lucifer the working directory. It is essential to wrap the PATH as the 'PATH' because this can turn the working directory to PATH.

Open the concluding and type:
cd anaconda3
For Windows user (make certain that the binder placed before Anaconda3):
cd C:\Users\Admin\Anaconda3

Pace iii: Create the yml file for the device:
The user has to create the yml file in the new working directory, and later the process installs the complete dependencies, the user has to run TensorFlow. At last, copy so paste the code in the last.
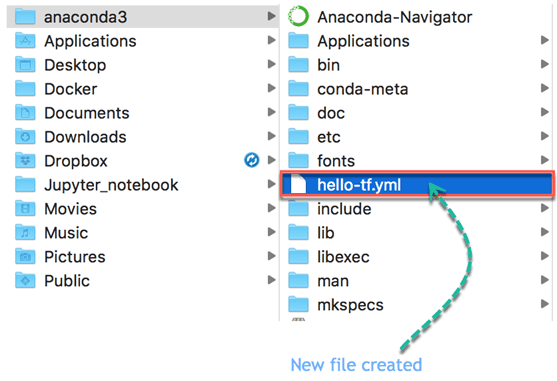
For macOS devices:
For the macOS users, the file name volition appear in the anaconda3:
'touch hello-tf.yml.'
For Windows devices:
The file name for the windows device is:
'echo.>hello-tf.yml.'

Pace 4: Edit the yml file
For macOS devices:
Users have to paste the given code in the concluding to edit the file because the yml file is ready to edit or macOS users can utilize the vim for editing the yml file.
half-dozen hello-tf.yml
User has to enter the edit mode to printing the ESC:
Press i to edit
Press w to salvage
Press q! to quit
Write the above code in the edit way and then press ESC followed past the:w
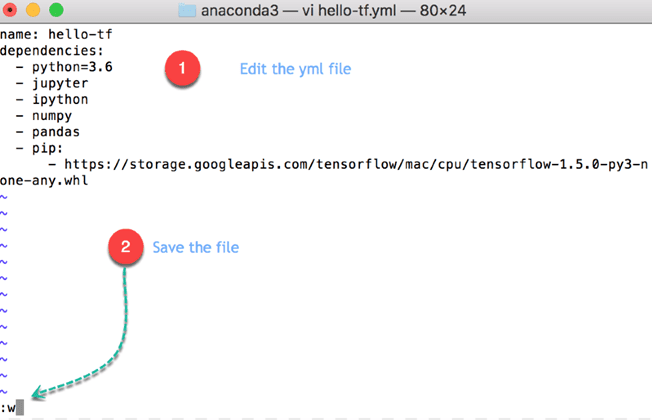
Important: Two spaces are needed after each intent because the file is the case and also intend sensitive.
For macOS devices:
proper noun: hello-tfdependencies:
- python=iii.6
- jupyter
- ipython
- pandas
- pip:
- https://storage.googleapis.com/tensorflow/MacOS/cpu/tensorflow-i.5.0-py3-none-any.whl
Here is the code explanation for the above code:
proper noun: hello-tf: Proper noun of the yml file
dependencies:
python=iii.half dozen
jupyter
ipython
pandas: Install Python version 3.vi, Jupyter, Ipython, and pandas libraries
pip: Install a Python library
https://storage.googleapis.com/tensorflow/MacOS/cpu/tensorflow-1.v.0-py3-none-any.whl: Install TensorFlow from Google APIs.
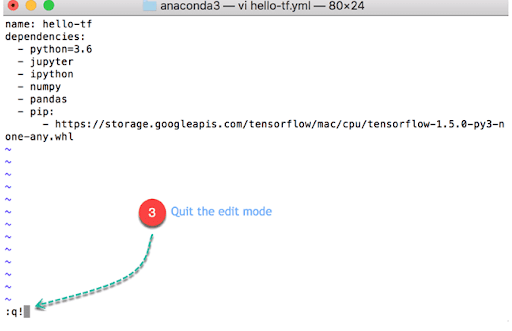
Then, press the Esc primal followed by the:q! to quit the edit mode.
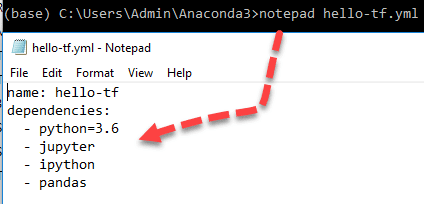
For Windows devices
Notepad is enough for the Windows devices considering it doesn't back up the vim programme
notepad howdy-tf.yml
Enter following into the file
proper name: howdy-of dependencies:
- python=iii.6
- jupyter
- ipython
- pandas
Here is the code explanation for the above code
name: hello-tf: Name of the yml file
dependencies:
python=iii.6
jupyter
ipython
pandas: Install Python version 3.6, Jupyter, Ipython, and pandas libraries
Information technology will automatically open up the notepad; then, the user tin can edit the file from at that place.
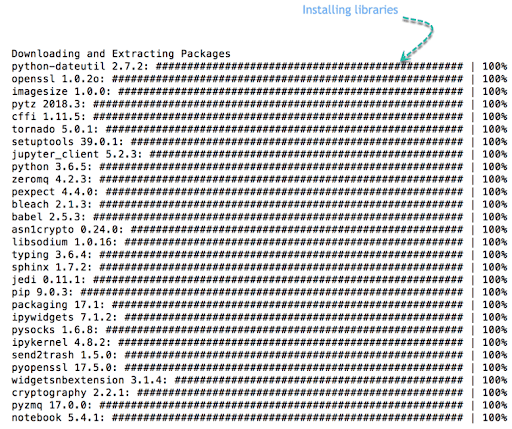
Pace five: Compile the yml file
User can compile the .yml file with the given code:
conda env create -f howdy-tf.yml
Annotation: the new surround is automatically created in the electric current users for Windows devices. This can take almost ane.i GB of the hd.
For Windows user:

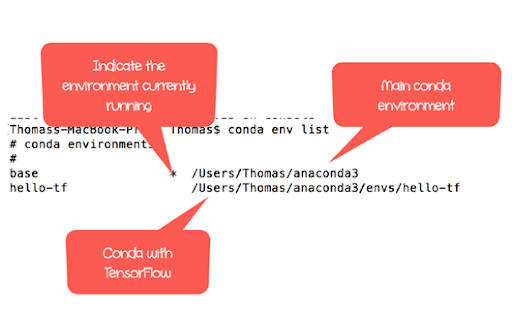
Step 6 Activate the conda environment
Now the user has two conda environments, and the user has created an isolated condo environment with the libraries the user will apply during the tutorials. This is required practice because each and every automobile learning project requires various libraries.
conda env list
For macOS devices:
source activate hi-tf
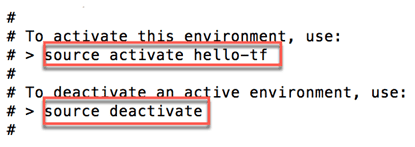
For Windows devices:
activate hello-tf
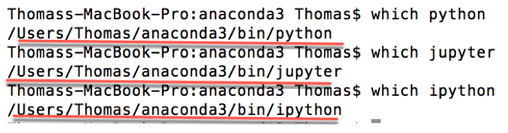
Users can hands check all of the dependencies that are in the same environment. This is essential considering it allows Python to use TensorFlow and Jupyter from a like environment, and in case users don't see the three, they are located in the same folder; and so, the user has to start all over again.
For macOS user:
which Python
which jupyter
which ipython
pip install --upgrade TensorFlow
For Windows devices:
where Python
where jupyter
where ipython
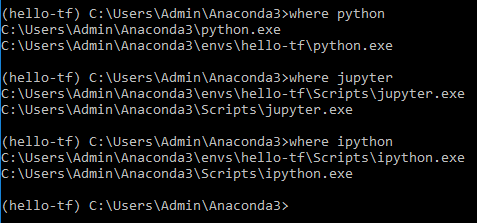
It is clear that at that place are 2 python environments first one is the main one, and the other one is created on i.e., hi-tf.
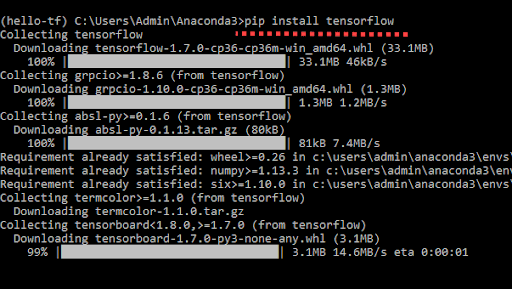
User has to install the Tensorflow with the following command:
pip install TensorFlow
Launch Jupyter Notebook
This procedure is the same in both Windows and macOS
Users can open up TensorFlow with the aid of Jupyter.
Note: Users have to initialize the environment for opening the TensorFlow each time.
User can proceed as follow:
Actuate hello-tf Conda environment
Open Jupyter
Import TensorFlow
Delete Notebook
Close Jupyter
Actuate conda
For macOS devices:
source activate hello-tf
For Windows devices:
conda activate hullo-tf

Open up Jupyter
After that, the user can open Jupyter from the Terminal
jupyter Notebook
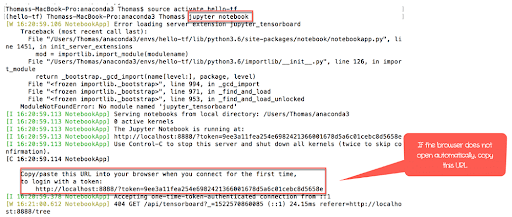
Web browser of the user'south device should automatically open the following link, or the user can copy this link which is provided by the terminal. http://localhost:8888
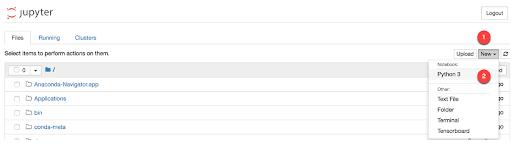
In the Jupyter Notebook, the user can meet all of the files in the working directory. Users can click on the Python3 for creating the new Notebook, and this new Notebook will automatically salvage in the working directory.
Import Tensorflow
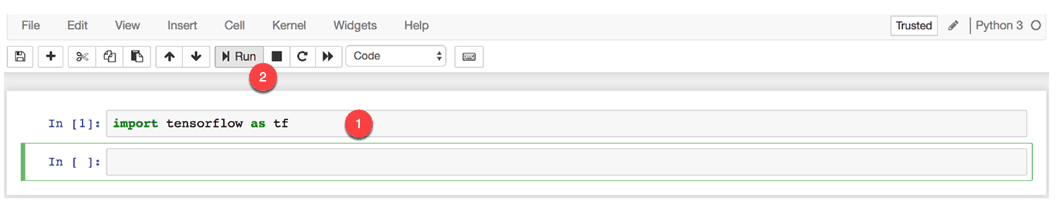
User can import TensorFlow with the tf allonym, in the Notebook and and so the user can click to run as a new cell is created beneath
import TensorFlow as tf
Write the first code with TensorFlow.
hi = tf.constant('Hello, Guru99!') hello
A new tensor is created now. Users successfully install TensorFlow with Jupyter in the system.

Delete file:
Users can delete the file, which is named Untitled.ipynb inside Jupyter.

Shut Jupyter
There are two means bachelor to close the Jupyter. The beginning one is directly airtight from the Notebook, and the second one is through the concluding or Anaconda Prompt.
From the Jupyter
Click on the logout in the main panel of Jupyter Notebook:

Users will automatically be redirected to the logout page.

From the terminal
Select the Anaconda prompt or terminal and run twice ctrl+c.
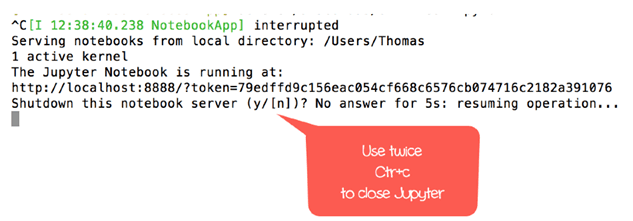
The first time users exercise ctrl+c and users have to conform regarding the shutdown of the Notebook by repeating ctrl+c to confirm.
The user has successfully logged out.
Conclusion
TensorFlow is a widely developing and beneficial applied science at the same time, and it is essential to follow every single footstep to install the TensorFlow in both Windows and macOS devices. The installation process and coding are dissimilar for both OS, and the above steps hold all of the information that is required to install TensorFlow.
People are too reading:
- Best Tensorflow Courses
- AI Books
- Types of AI
- AI Technologies
- Benefits of Artificial Intelligence
- Future of Bogus Intelligence
- AI Applications
- What is Artificial Intelligence?
- Difference betwixt AI vs Machine Learning
- Data Scientific discipline Projects
- R For Data Science

Source: https://hackr.io/blog/how-to-install-tensorflow
Posted by: purvistwoulair.blogspot.com
0 Response to "How To Install Tensorflow Contrib"
Post a Comment